Measure templates
Recently a new feature has been added to Customer Insights, which allows to create measures based on templates.

If you select "Choose a template" various templates are offered, that allow the calculation of popular KPIs, like Average transaction value, Loyalty points earned or Time since last purchase:

If you select one of the templates, e.g. "Loyalty points earned" a short description of the measure based on an example, the formula behind the measure and the data, which is required to calculate the measure, is displayed:

As we can see, this template is based on activities and the activities need the following information:
- How many loyalty points have been earned with a purchase
- Activity timestamp of the purchase
Which means we have to setup an activity first, before we can define our measure.
Activities
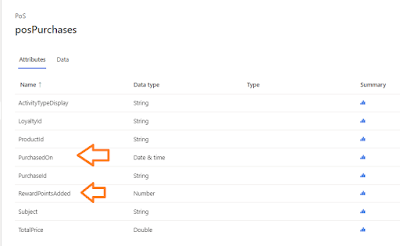
In this example, we have an entity called "posPurchases", which contains transactional data in the following format:
To add a new activity, we navigate to Data --> Activities and select "Add activity":

We fill out the required data and click on save:

Once our activity definition has been saved, we click on run to generate the activities:

When the activites have been generated successfully, they will appear in the timeline on the customer profile:

Measure
Now that our activites have been generated, we are prepared to define our measure. We navigate to Measures --> New --> Choose a template and choose the template "Loyalty points earned".
In the details screen once again the formula is presented and you can choose for which time period (all time, year to date, ...) the measure shall be calculated.
We will stay with the default "All time":

Now we click on "Add data" and choose the activity, we have previously defined:

Then we have to select the fields that store the necessary information from the activity entity:

This is actually a bit though, since the fields are not represented with the field name of their originating entity, but rather with the general field names of the activity entity. So we have a look at the unified activity entity, to find the correct attributes:

So we go with following selection:

We have finalized our measure definition and click on run:

Now our measure is calculating:

When the calculation has been successful, a new entity is created, storing customerid and the loyalty points earned:

That entity can then for example be used to create segments to send a marketing campaign to all customers having more than 500 loyalty points:

Conclusion
This is still a preview feature and it feels a bit like that, so I expect changes to come. I really like the idea to create measures based on templates, though I would have expected that instead of a customer measure (= own entity) a customer attribute would have been calculated, so that a KPI tile would have been shown on the customer profile.
Also the process to first create an activity, before you can create a measure, makes it a bit complicated. And I think the idea behind this feature was, to give the customers an idea, what measures they could calculate with CI and it should be a starting point for them.
Your comments are totally true. With the current set up, the tool requires at least 2 users: one data scientist who really knows the data structure, the primary keys and the logic between the entities and the power user of the business division, who will be able to interprete the results and decide on, let's say, marketing campaign.
ReplyDeleteFrom a user point of view, I would expect that building the activity is part of the process for building the measure itself, so that we do not have to cut the process into pieces to be able to work.
Let's see what the next releases will bring :)
B2B Casino Ireland ᐈ €300 + 300 FS + 200 Bonus Spins
ReplyDeleteThe B2B 영천 출장샵 Casino has 경산 출장안마 a solid 안양 출장마사지 reputation and is a very 광주광역 출장샵 safe casino. The site has a long-standing reputation with online gambling. It is 진주 출장안마 licensed and